Anyone could shoot .jpeg and make it look good.
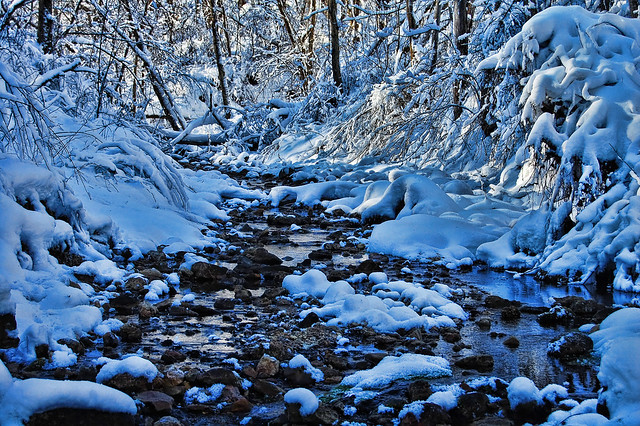
Then I ran into an issue with the color of snow during the winter. And believe me, winter is my favorite time to be out with any camera.
I added Topaz Plug-ins to my Adobe Elements 5 and Photoshop 7.0 [very old versions].
I was able to transform this .jpeg blue cast snowy scene from this:
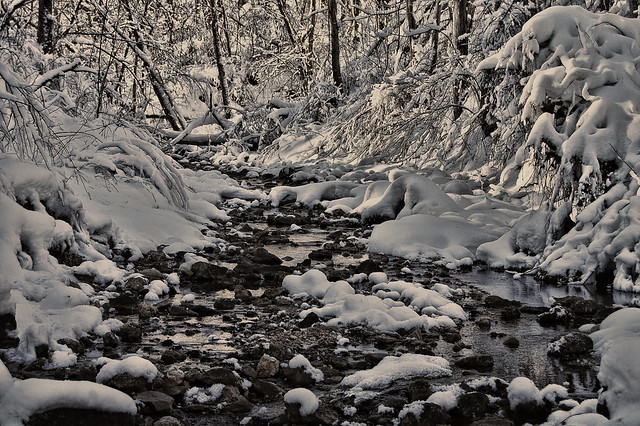
To this:
I used to argue that it just made the scene colder looking. But the snow and sunlight was fooling my camera.
I knew that from somewhere back ages ago when my dad was helping me with photography. He didn't have the benefit of digital and the aid of a 'digital darkroom'.
After reading this article by PCWorld regarding 5 tips for shooting in the Winter, I decided to switch my cameras over to RAW+JPEG mode. This way I could compare shots.
Now don't get me wrong. I also love my little point and shoot cameras. They are easy to carry around and sometimes you can be extremely surprised by getting it right with one of those. Here is a shot from my cheapo Sanyo Pink Fugly camera.
There are may arguments for buying and using Adobe Light Room, but I haven't tried it yet. I've been told once I try the trial version ... I'll just have to have it.
Here is the .jpeg shot:

Here is the .RAW shot converted to a .TIFF, then saved to a .jpeg for this post:

Here is the shot after Adjust 5:

Dynamic Photo HDR.
Here is is with Dynamic Photo HDR single image processing:

I think the shot shot and processed in the RAW format made my life a lot easier. I didn't have to work so hard on the shot to remove the blue cast and bring the brightness to the correct level.
I could have worked hard in Elements to achieve what I did in minutes to get that first shot.
I also like what was done with it in Topaz and in DP HDR. But that is just my personal opinion. The shot I developed from RAW was correct, but I like a bit more 'oomph' to my snow scene and reflections.
I did some test shots using the Nikon D3100 and the jpeg's nearly turned out as correct as the RAW shots. The Nikon D40 gets a nod from using RAW and after going out for a bit today, we'll see if I can get rid of that 'fantasy' blue with the Olympus E-420. [That is the first shot that is shown on this post.]
I'm learning a foreign language here, Val! Guess I need to google some new terms.
ReplyDeleteIf you have questions ask and I'll try and explain!
ReplyDelete