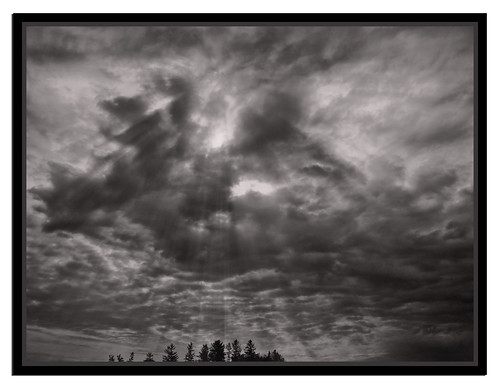
First you need to start out with a sky shot that has potential. I shot this photo with my old point and shoot camera on the way home from work. The sky opened up and let rays of light through. Unfortunately this did not show up on the photo I'd taken.

So these are the steps I used to create this:
Step one:

I loaded this into Adobe Elements 5 and made 3 layers of the same photo after I used Topaz BW Effects to get the color and adjustments I wanted.

I chose the middle layer to adjust for the 'faked in rays'. Here it is already done. Below are the steps.
Choose the layer and change your levels to one end of the spectrum or another. It takes experimentation to figure out which will work best for the photo you are using. I chose to go very dark and use the light colors for the rays.

After choosing my levels, I next went to Filters>Blur>Radial Blur and did the following:

I used Ctrl F about three times to get the proper 'whisps' of light. I also made sure that the 'whisps' flowed downwards instead of from the center of the photo.
Since this was the middle layer, I had to adjust the top layer's opacity and a bit of adjustment on the middle layer to get the effect I wanted.

Did I want to go realistic? Or did I want to go a bit more dramatic?

This is not hard to do and can add quite a bit of interest to any sky shot. I've done this with sunrise and sunsets.
It is pretty fun and sometimes can save a rather BLAH photo.
No comments:
Post a Comment
Please include at least your first name if you are commenting Anonymously. Thank you.